You’ve made the important decision to make GroupSpot your platform of choice. Next step is to make your group look sharp and your content organized before inviting members to your new group. To help you get there, we want to spotlight a few important but sometimes overlooked settings, share a few tips on amplifying the member arrival experience, and highlight a few best practices to engage your audience.

Settings:
1. Add Membership Questions
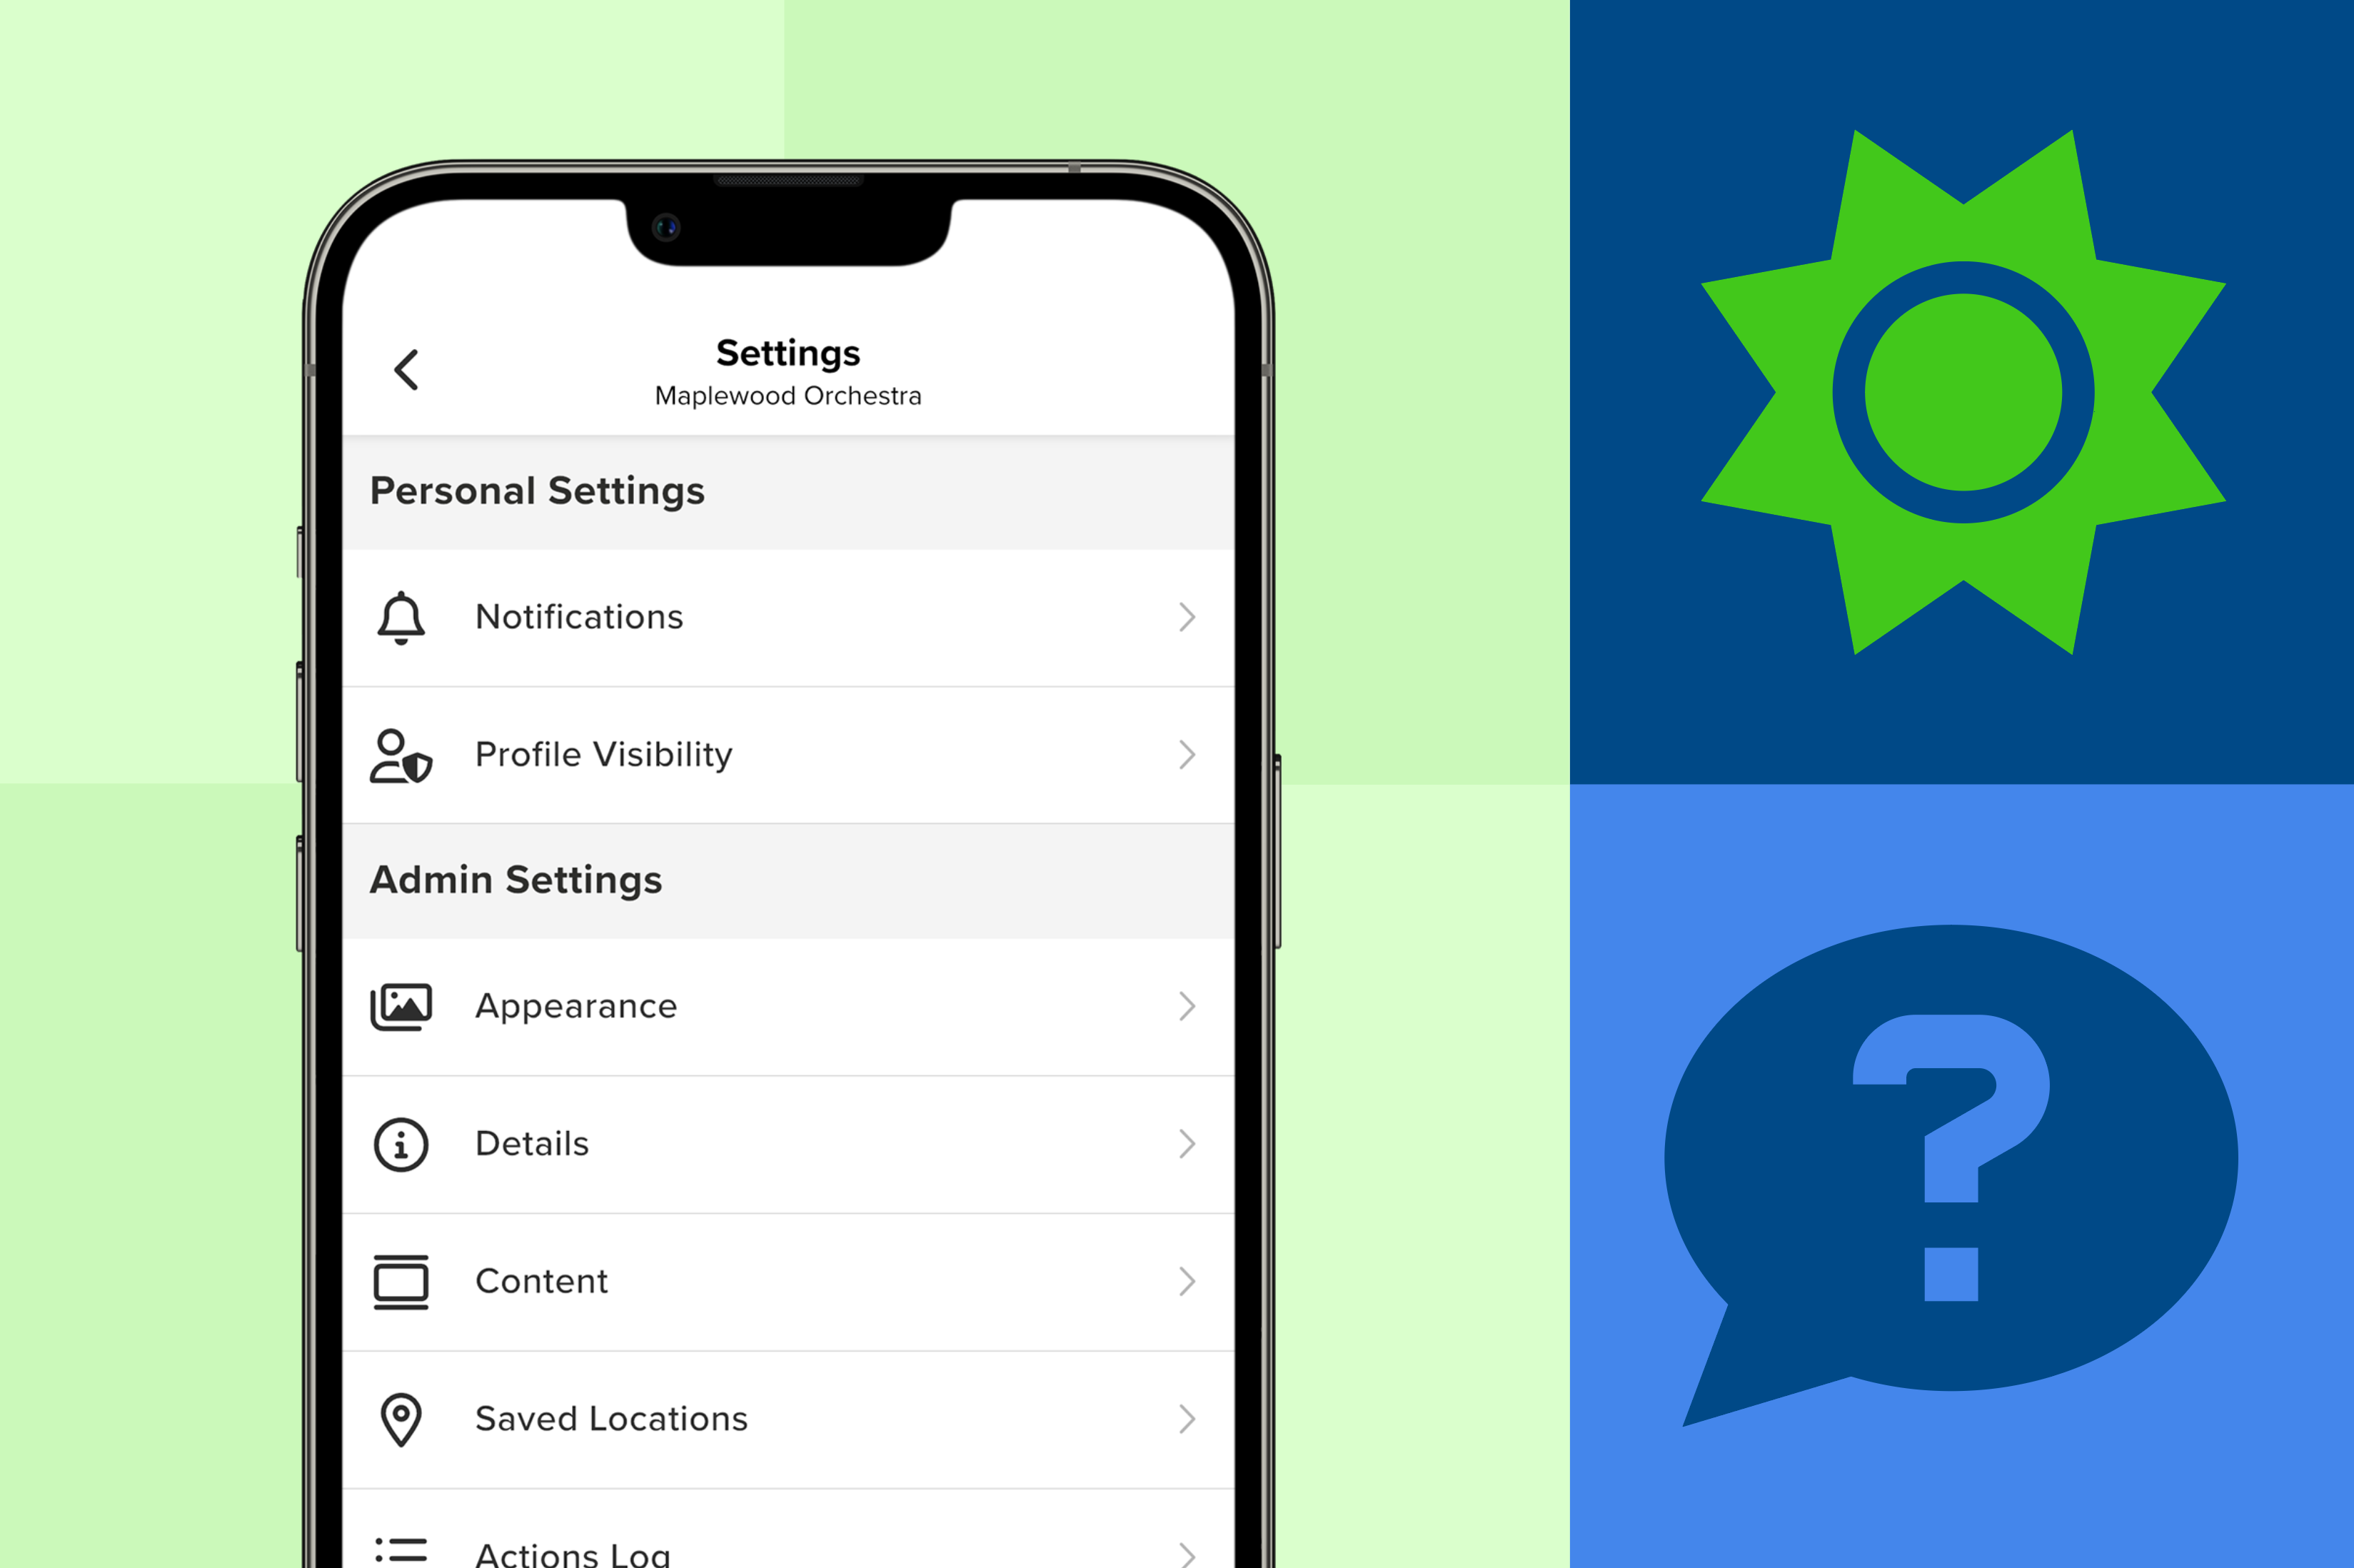
Membership Questions were designed to help admins maintain the privacy of their group. They give admins the power to screen prospective members based on answers provided. They also help you familiarize yourself with new members. Membership questions can be added during the create group process or later by choosing Privacy from your Settings.
2. Require Full Names & Phone Numbers
When a new user creates an account for the very first time, GroupSpot only requires a first name. For anyone running a large, organized group, having the member’s full name – first and last – is a must. You need to know who to let in, who’s receiving your communications, and who you're reaching out to. Therefore, GroupSpot gives Owners the ability to require first and last names inside their groups. GroupSpot also gives Owners the ability to require a phone number too. Both settings are defaulted off, but can easily be turned on by an admin.
3. Add Time Zones to Events
Another important setting is time zones. They are especially important to add to event and game posts for members coming from different places and time zones. Even if your group largely hails from the same area, having time zones turned on is helpful when members travel. Now anyone anywhere, can easily determine the right start time for important events and games. Time zones can easily be turned on by choosing Content from your Settings.
4. Add Emergency Contacts
Members can add emergency contacts to their membership profiles very easily. These contacts give admins a quick and easy way to access important contact details if something unforeseen were to happen. Admins have a responsibility for their membership, especially for minors, so having emergency contacts readily available provides some peace of mind. No one can predict when these contacts will be needed, so why not add this layer of security to member profiles?
5. Choose Your Primary View
The last big settings decision is choosing your primary feed view. GroupSpot provides three distinct views, accessible with a swipe: Feed View, Upcoming View, and Pinned Posts. Depending on their needs, Owners can choose between the default, Feed View, and the alternative, Calendar View. For more organized groups looking to optimize their experience as well as take advantage of the full suite of available tools, GroupSpot recommends the default Feed View. However, if you only need a forward looking calendar, the Upcoming View would be better suited for you. Changing your primary view can easily be switched by choosing Content from your Settings.

Identity:
1. Nail Your Identity
Your identity starts with your Header, Avatar, and Color. Regardless of whether you go with a photo or a graphic for your header and avatar, you want these creative assets to pop because this is the first visual cue members see when they join your group. Headers are rectangular shaped (2:1), while avatars are square shaped (1:1). Choosing your color is also important because this color appears on your group’s calendar. And if you’re a team, color appears in your roster as well. Adding your identity can easily be handled by choosing Appearance from your Settings.
2. Add Important Group Details
Most groups come to GroupSpot in search of a dedicated place to run their group in a private setting. But groups making the switch sometimes keep their website and public-facing social media active. Therefore, GroupSpot provides an easy-to-find home to highlight those other platforms in your Group Details. Open up Settings and choose Details to add a Website, social media, and other important info like Headline, Location, About, and Rules.

Engagement:
1. Sprinkle in Great Content
Before inviting members to your group, your feed should feature a healthy number of posts (e.g., 4-6 posts). You want enough content for new arrivals to be able to explore the feed with a scroll upon arrival. You can also bring your feed to life by providing a variety of post content like a photo album post, an event post with RSVP and signups, or even a game post if you’re a team. Dynamic content will immediately capture the attention of new arrivals and demonstrate you made the right choice going with GroupSpot.
2. Choosing Your Post Display
GroupSpot gives you the flexibility to post to either your Feed & Calendar or Calendar Only depending on the nature of your post. Sometimes events or games, especially those in the future, are better suited to live on your calendar until you’re ready to move them over to your feed as the date approaches. Or sometimes that event or game needs to appear right at the top of your feed upon creation. Either way, moving events and games from the Feed & Calendar to Calendar Only and vice versa is easy to update on any given post.
3. Take Advantage of All the Tools in Your Toolbelt
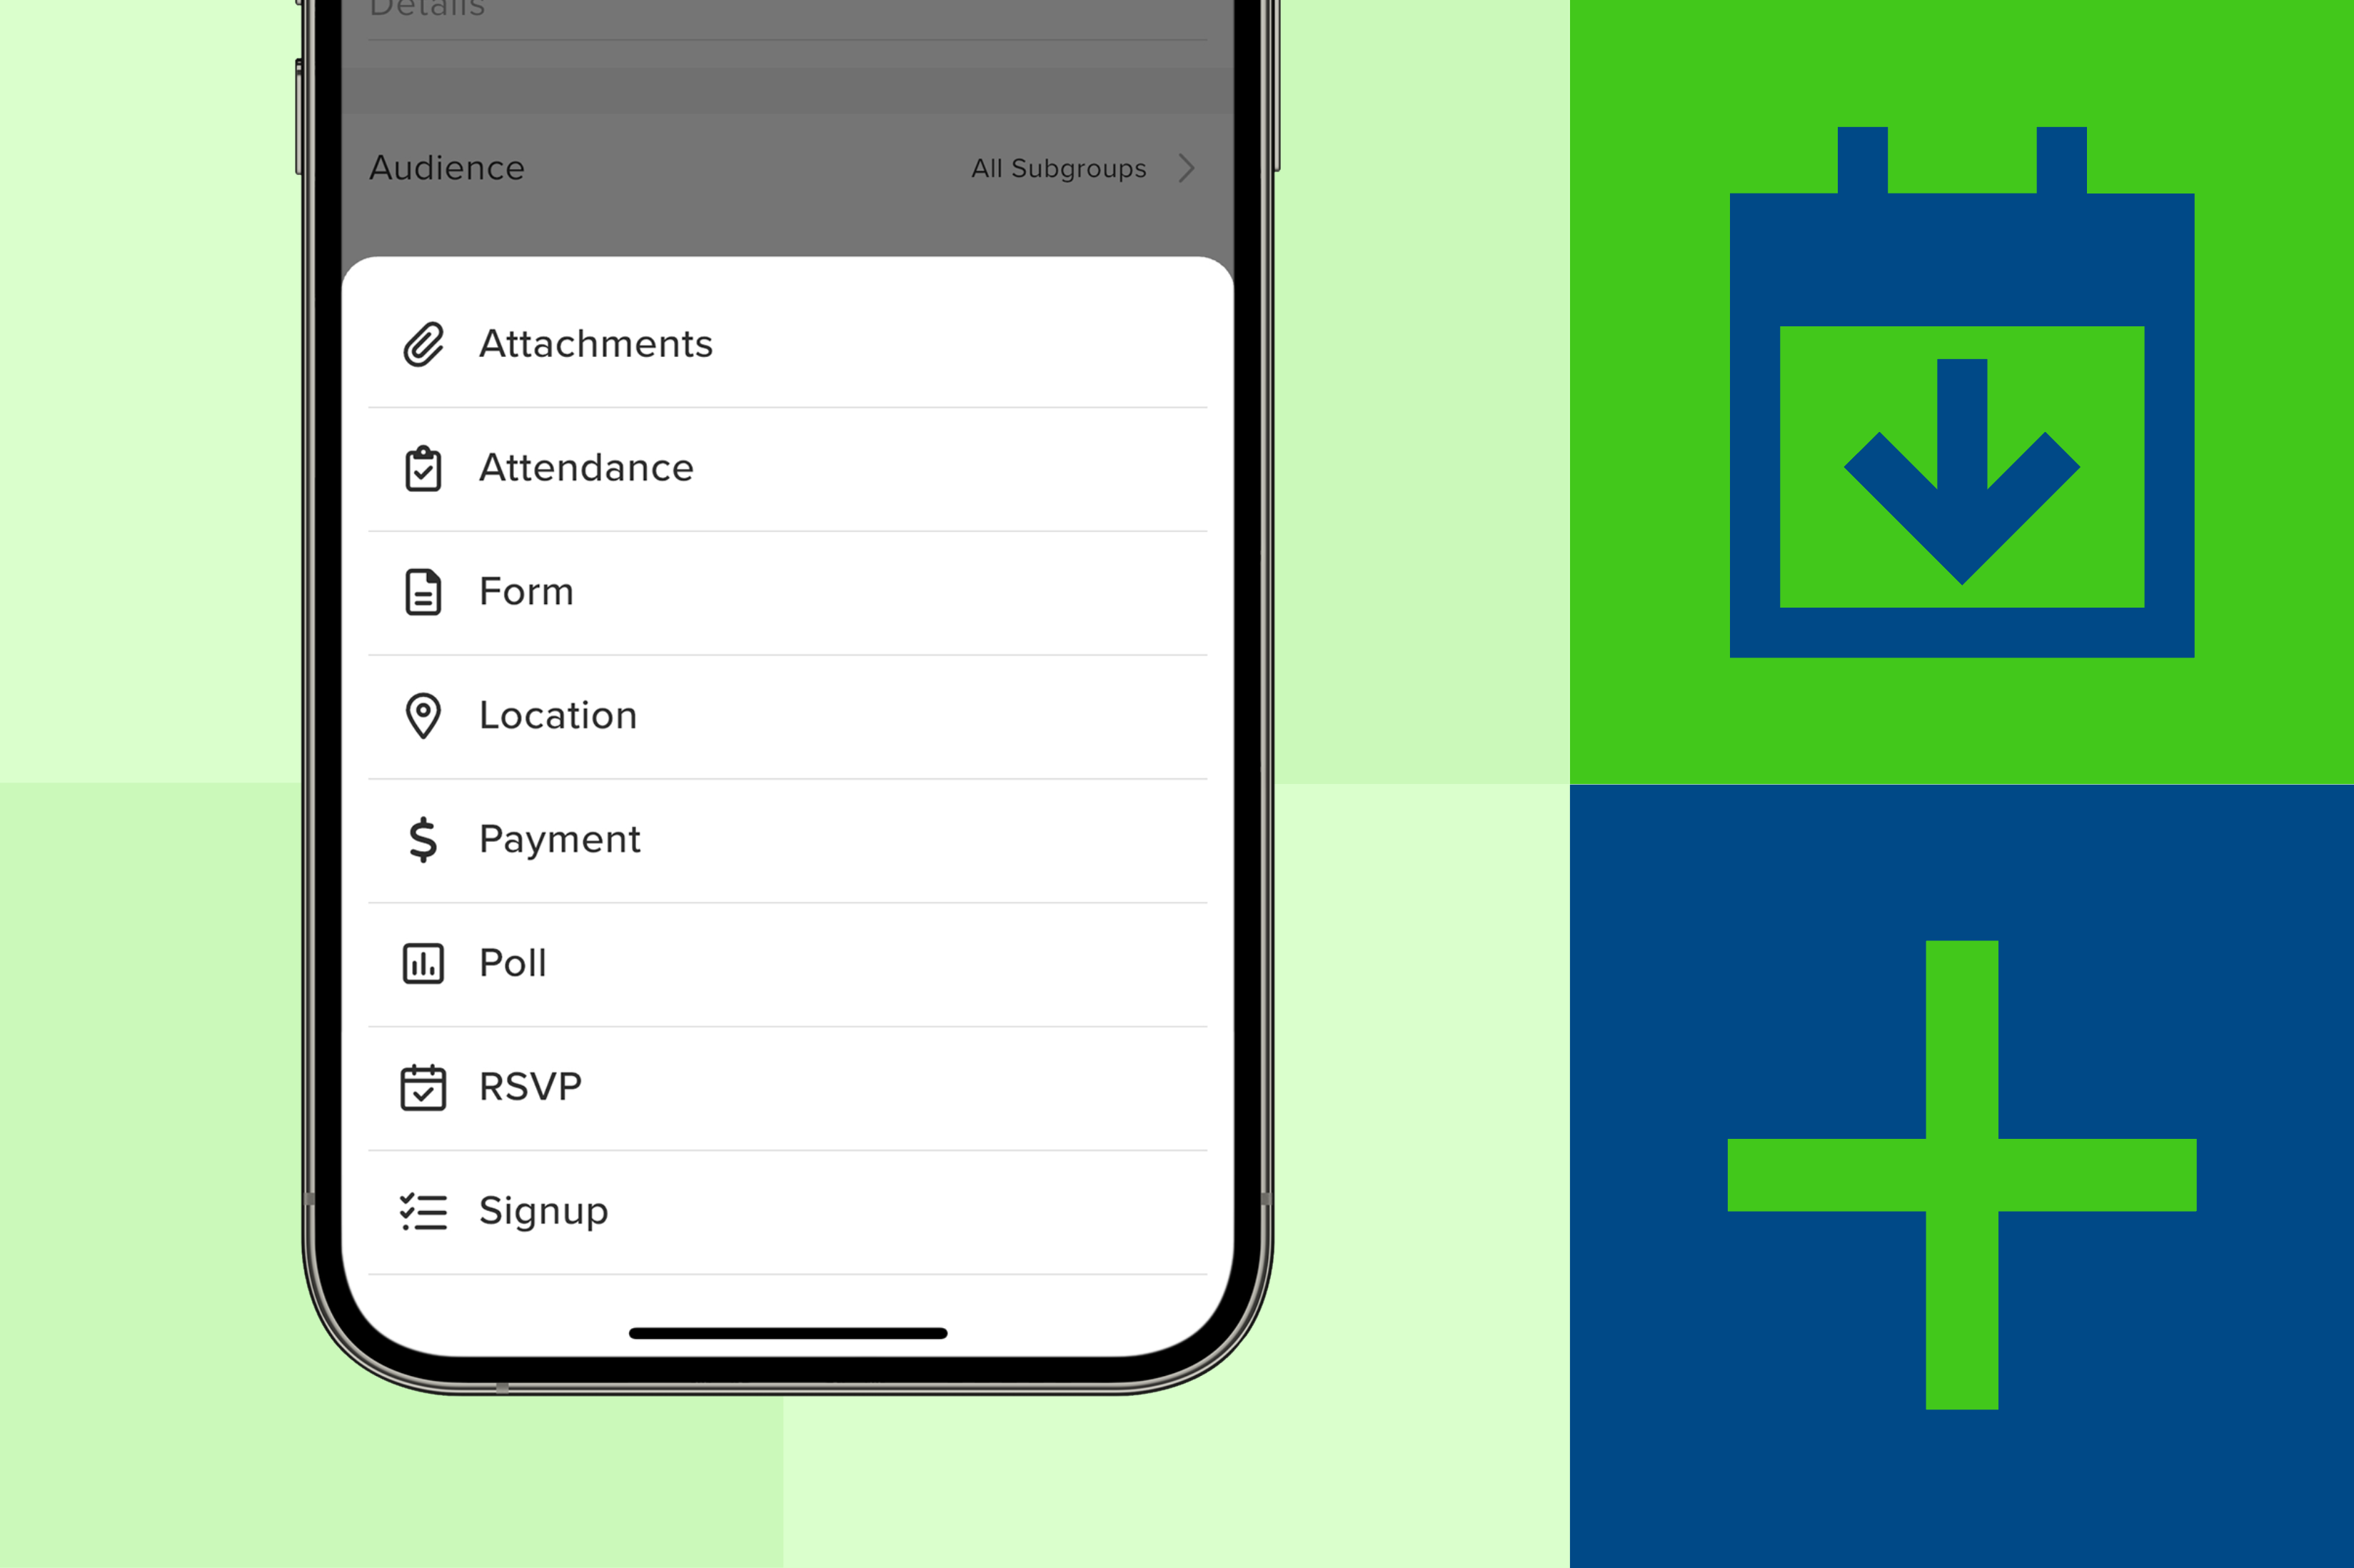
GroupSpot delivers maximum utility and flexibility when it comes to creating dynamic posts. Just tap the + icon during the create post flow to access a menu of add-ons that include Attachments, Signup, Poll, Form, Attendance, Location, and RSVP. Add as many add-ons you need to build your killer post and serve your audience. When you do, you’ve not only streamlined the experience for admins but members too.
These best practices should serve as a good starter’s guide to creating a great group before adding your members. These tips and tricks are also great to share with your fellow organizers.


