

There are times when administrators have a limited number of spots available for an event and need to set a maximum attendance capacity. They may also want to enable a waitlist to handle overflow while automatically filling open spots as attendees change their RSVP.
One important note is that setting a maximum attendance limit is a free feature available to all groups, while waitlists are available exclusively to Premium subscribers.
Both can be set up in just a few steps.
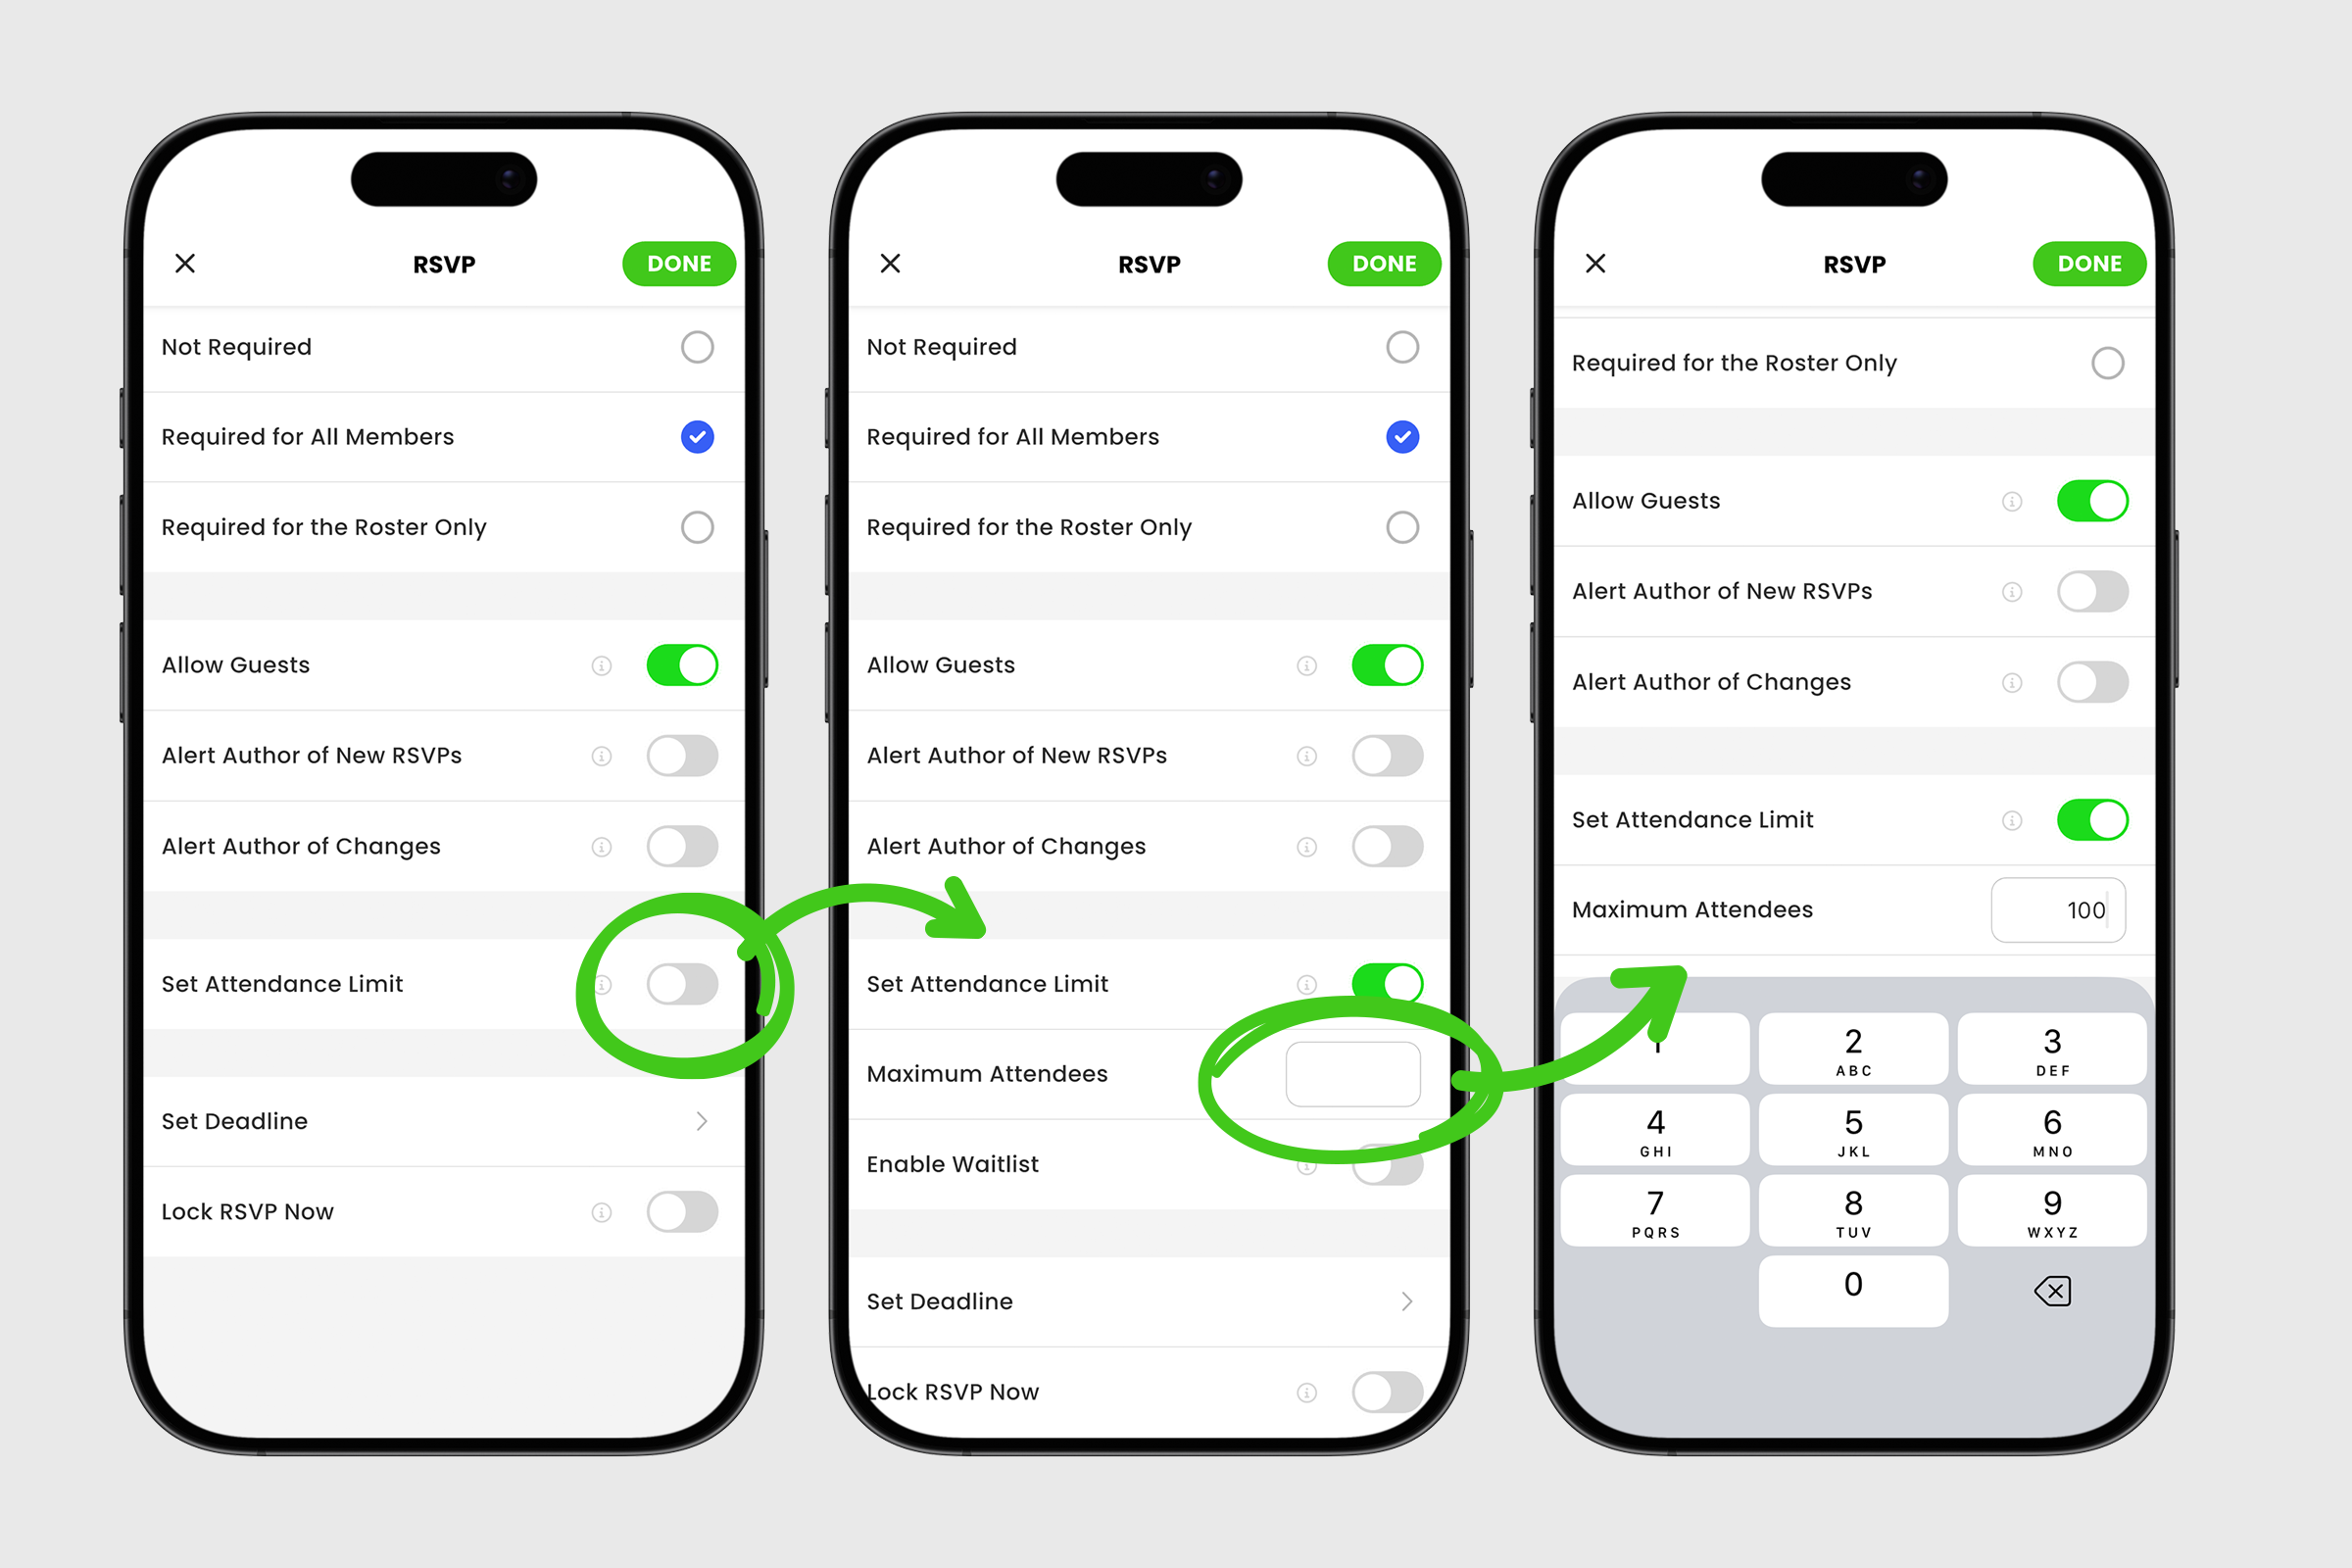
1. From a standard post, tap the blue Add to Post button and select RSVP to open the RSVP settings. From an event or game post, simply tap the RSVP row to access the same screen.
2. Tap Required for All Members to open the full RSVP menu. If your group uses the Roster feature, you can also choose Required for the Roster Only.
3. After making decisions on other important RSVP matters like Allow Guests, Alert Author of New RSVPs, and Alert Author of Changes, toggle Set Attendance Limit to ON.
4. Enter your Maximum Attendees number.
5. When finished, tap DONE to return to your post, then tap POST to publish.
Premium subscribers can also enable a waitlist for their RSVP.
1. After entering the maximum number of attendees, toggle Enable Waitlist to ON.
2. Tap DONE to return to your post, then tap POST to publish.
Waitlists are designed to reduce the workload for administrators. For example, if an event has a maximum capacity of 10 attendees and one person cancels, the first member on the waitlist is automatically moved into the available spot. Waitlists become even more valuable when guests are allowed, making it easy to keep your event at full capacity with little to no manual work.


